You can fix most drywall repairs problems yourself with the right small tools and a clear plan, whether the issue is a nail pop, a hairline crack, or a small hole from furniture. A quick patch with spackle or joint compound and basic sanding will restore appearance and prevent further damage, saving you time and money compared with full replacement.
This guide Drywall Repair walks you through spotting common wall issues and a practical, step-by-step surface restoration process so you can tackle repairs confidently. Expect simple techniques, tool recommendations, and troubleshooting tips that make the work straightforward and reliable.
Recognizing Common Wall Issues
You’ll learn to spot specific damage types and judge when repairs are simple DIY work versus when you need a pro. Focus on visual signs, texture changes, and moisture indicators to prioritize fixes.
Identifying Different Types of Damage
Cracks: Look for hairline versus structural cracks. Hairline cracks often follow seams or corners and are usually cosmetic; wide, stair-step, or cracks that grow over time can indicate framing movement or foundation issues.
Holes and punctures: Small nail or screw holes are straightforward to fill with spackle. Larger holes (beyond about 3 inches) require a patch—either a mesh patch or a cut-and-replace drywall piece—and backing for support.
Water damage and staining: Yellow or brown stains, blistered paint, soft or sagging drywall, and a musty smell point to moisture intrusion. Trace stains to roofing, plumbing, or exterior leaks before repairing the wall surface.
Tape failure and delamination: Bubbling or exposed tape along seams means joint compound adhesion failed or improper taping. Peeling paint or paper indicates poor surface prep or prolonged dampness.
Assessing the Severity of Wall Imperfections
Size and progression matter. Measure cracks and holes and mark their ends; if they widen or extend over weeks, the cause is active and needs professional assessment.
Tap tests and softness checks help gauge structure. Lightly press stained or sagging areas—if the drywall feels soft, it’s likely water-damaged and should be cut out to inspect studs and insulation for rot or mold.
Location determines urgency. Cracks near windows, doors, or ceilings often relate to settling; cracks running diagonally from corners suggest stress. Water stains near plumbing fixtures or ceilings above bathrooms require immediate leak investigation.
Visible mold, persistent dampness, or foul odors elevate priority. In those cases, stop cosmetic repairs and address the moisture source, then remediate mold following safety guidelines or hire specialists.
Step-by-Step Surface Restoration
You will gather the right tools, prepare the work area to prevent dust and damage, and choose the correct patching method and compounds for your specific hole or crack size.
Essential Tools and Materials
You need a basic kit: a 6–8″ taping knife, a 4″ putty knife, sanding block (120–220 grit), utility knife, drywall saw, and a screwdriver or drill.
Keep on hand 3″ drywall tape (paper or fiberglass), joint compound (pre-mixed all-purpose or setting-type powder), and 1/2″ or 5/8″ drywall patches or sheet stock for larger repairs.
Consumables include screws, adhesive (drywall or construction adhesive), a dust mask, safety glasses, and a drop cloth.
For finishing, have primer, matching paint, a small roller, and a brush. Match compound type to job: use quick-set (hot mud) for fast, deep fills and pre-mixed for feathering and sanding ease.
Preparing the Area for Repairs
Clear furniture and cover floors with a drop cloth; use painter’s tape to protect trim.
Turn off HVAC or block vents to reduce dust spread.
Remove loose paper, crumbs of gypsum, and deteriorated compound around damage with a utility knife.
Square or enlarge irregular holes into clean shapes for easier patch fitting, and expose at least 1⁄2″ of solid gypsum around the cut.
If the cavity contains wiring or plumbing, shut power or water and verify clearance before proceeding.
Vacuum dust and wipe the edges with a damp sponge; allow to dry. Clamp or add backing (wood strip or mesh) behind larger holes to secure the patch before fastening.
See also: Bridge Financing Canada: Short-Term Solutions for Property Purchases and Cash Flow
Techniques for Patching Holes and Cracks
For small nail pops and hairline cracks, widen the crack slightly with a utility knife and apply thin coat of joint compound; embed fiberglass tape over wider cracks, then feather two thin coats.
Sand lightly between coats with a sanding block, using 120–150 grit for compound shaping and 220 grit for final smoothing.
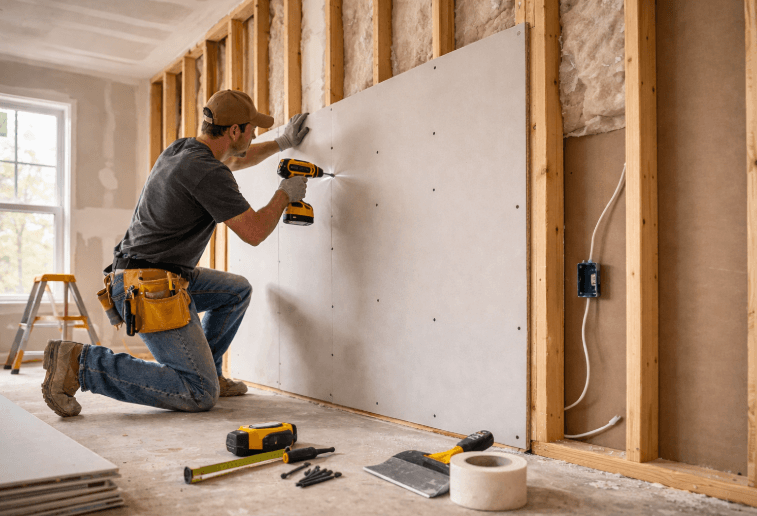
For holes up to 2″ use a self-adhesive patch or cut a circular patch of drywall, apply adhesive, bed the patch, and screw through edges into backing.
For holes 2″–6″, install a wood backing strip or metal patch behind the drywall, fasten patch, then tape and apply three coats of compound: fill, build, and feather.
For larger or irregular gouges, cut a square around damage, fit a drywall piece to the cavity, fasten to backing, tape seams, then apply compound in progressively wider coats.
Prime patched areas with a stain-blocking primer before painting to ensure consistent finish.